
Guide · Art-Net recording
How to record Art-Net on Raspberry Pi.
Connect CUE/IO to the lighting network, confirm the incoming DMX data, record the programmed show and verify it before moving to standalone playback.
What you need before recording
- A Raspberry Pi 4 or Raspberry Pi 5 running the current CUE/IO image.
- A wired Ethernet connection to the Art-Net network.
- A lighting console or software source sending Art-Net.
- Art-Net nodes or fixtures configured for the intended universes.
- Optional Linux-compatible USB audio input when synchronized sound must be recorded.
Keep addressing simple during the first test. Confirm the console, Raspberry Pi and nodes are on a network configuration that allows the Art-Net packets to reach the recorder.
1. Connect and verify the Art-Net input
Connect the Raspberry Pi to the same wired lighting network as the Art-Net source. In CUE/IO, select the correct network interface and open the live monitor. The packet log and channel view help confirm that data is arriving from the expected source and universe.
Move a known fader or run a short test cue on the console. Check that the monitored channel values respond. If no packets arrive, resolve the network, interface, universe or Art-Net output settings before pressing record.
A clean input check prevents empty or incomplete show files and makes later troubleshooting much faster.
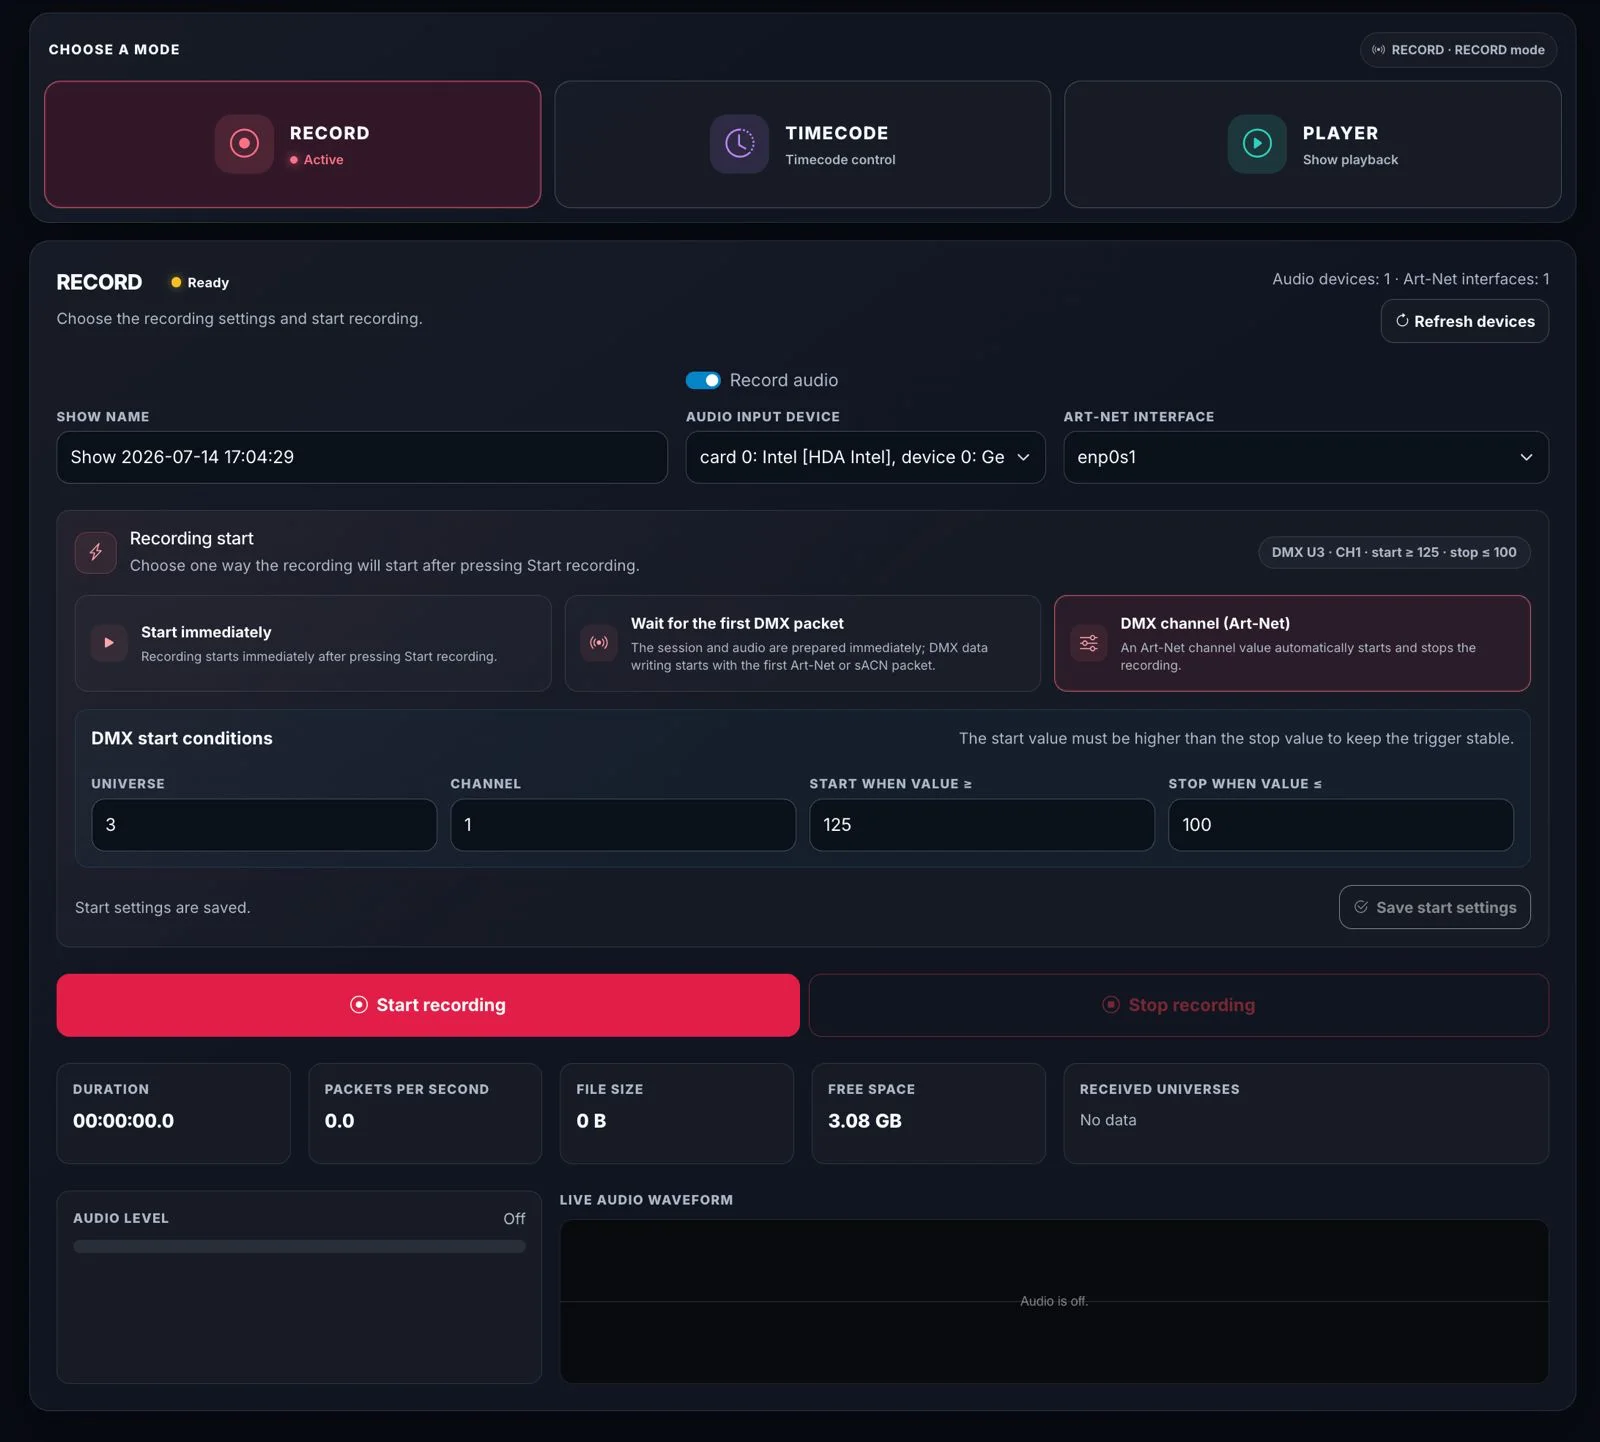
2. Record the complete programmed show
- Name the show clearly.Include the project, scene or version so operators can identify it later.
- Choose whether audio is required.If enabled, select and test the supported USB audio input before starting.
- Start the recording.Begin immediately, wait for the first packet, or use the configured Art-Net channel condition where that workflow is appropriate.
- Run the show from beginning to end.Avoid unrelated console output during the capture.
- Stop after the intended final state.Allow enough time for the ending values to be recorded before saving.
3. Verify playback before removing the console
Open the saved show in Player mode and replay it to the same Art-Net nodes. Compare the beginning, transitions and final look with the console playback. If audio is present, listen through the intended playback route and confirm that the complete experience remains aligned.
Do this verification on the actual deployed network whenever possible. The built-in benchmark can estimate a safe universe count for that Raspberry Pi and configuration; there is no single capacity number that applies to every network, storage device and audio setup.
4. Select the standalone start method
- Local Player: an operator starts or switches shows in a browser.
- Scheduler: playback starts by date, weekday or time.
- GPIO: a button, switch or suitable sensor starts an assigned show.
- Incoming LTC: an external LTC source triggers prepared timecode cues. CUE/IO does not generate LTC.
- Autoplay: a prepared sequence starts after the Raspberry Pi boots.
After selecting the method, restart the system once and test the complete operating routine. Then export a backup of the commissioned show files.